
Webpage to JPG Converter
🌐 Webpage to JPG Converter
Convert any webpage or URL into a JPG image — free, fast & no watermark
Convert WebP to JPG Online | Free Webpage To JPG Converter
Convert WebP to JPG online for free no software needed. Learn why our free WebP to JPG converter is the fastest, easiest way to make your images universally compatible. If you’ve ever downloaded an image from Google, a modern website, or an e-commerce platform and found that it won’t open in your photo editor, email client, or favorite app you’ve run into the WebP problem.
Have you ever needed to capture a website as an image for a presentation, a client report, a portfolio screenshot, or social media content and found yourself fumbling with keyboard shortcuts, browser extensions, or clunky desktop software?
There’s a much easier way.
Our free convert Webp to JPG Converter lets you convert any public URL into a high-quality JPG image directly in your browser. Just paste a link, hit Capture, customize your settings, and download your screenshot. No software to install. No account to create. No watermark on your image.
Key Features of This Free Convert Webp to JPG Tool
This isn’t a basic one-click screenshot tool. It’s a fully customizable capture solution with advanced settings designed for better control and higher-quality results.
1. Instant Capture — No Software Required
Simply enter any public webpage URL and click the Capture button. The tool processes the page within seconds and generates a downloadable image directly in your browser. No downloads, extensions, or plugins are required.
2. Three Screen Width Options
Choose how the webpage should be displayed before capture:
- Desktop (1280px) — captures the desktop layout
- Tablet (768px) — renders the responsive tablet view
- Mobile (390px) — displays the mobile version of the page
These options are useful for responsive design testing and previewing websites across different devices.
3. Three Output Formats
Save your screenshot in the format that best suits your needs:
- JPG — smaller file size, ideal for sharing and presentations
- PNG — sharp image quality with support for transparency
- WEBP — modern format with excellent compression
4. Full Page or Viewport Capture
Select your preferred capture mode:
- Full Page — captures the entire webpage from top to bottom
- Viewport — captures only the visible area of the page
Full-page mode is ideal for long articles and landing pages, while viewport mode works well for previews and thumbnails.
5. Image Quality Slider
Adjust image quality from 30% to 100% to balance file size and visual clarity. Higher settings preserve more detail, while lower settings create smaller files.
6. Capture Delay Options
Choose a delay of 0 seconds, 2 seconds, or 5 seconds before the screenshot is taken. This helps ensure animations, images, and dynamic content have fully loaded.
7. Scale / Zoom Control
Set the capture scale to 1x, 1.5x, or 2x for greater image detail and improved sharpness.
8. Background Color Selection
Choose a background color to enhance the appearance of your screenshot. Use preset colors or enter a custom hex code for a personalized look.
9. Custom Filename
Rename your screenshot before downloading to keep files organized and easy to identify.
10. Copy to Clipboard
Copy the captured image directly to your clipboard and paste it into documents, emails, presentations, or design tools without saving a file first.
How to Convert WebP to JPG Online?
Using a free online WebP to JPG converter is remarkably simple. Here’s how the process works:
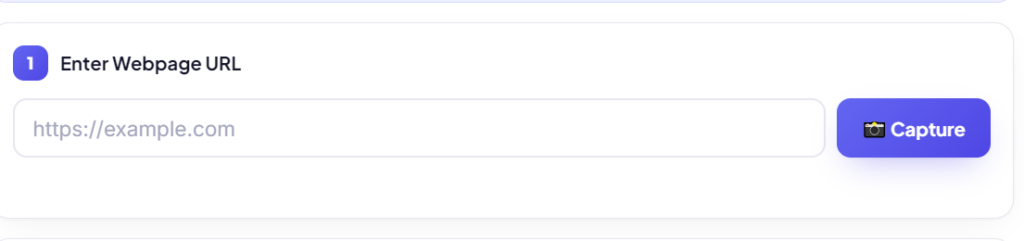
- Step 1 : Enter Your URL Paste any public webpage address into the URL input field. You don’t need to include
https://— the tool adds it automatically if missing.
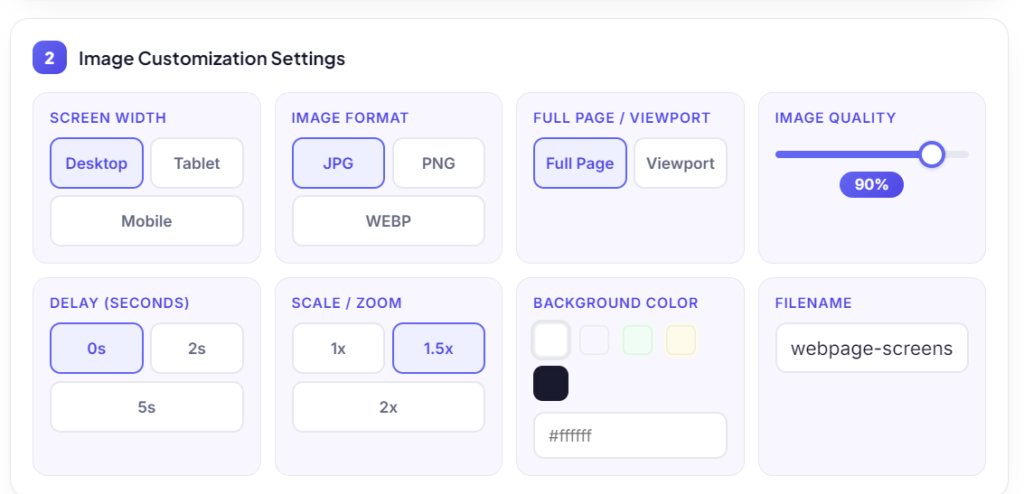
- Step 2 : Choose Your Settings Before capturing, configure your preferences in the Image Customization Settings panel:
- Select screen width (Desktop / Tablet / Mobile)
- Choose output format (JPG / PNG / WEBP)
- Set capture mode (Full Page / Viewport)
- Adjust quality with the slider
- Set a delay if needed for slow-loading pages
- Choose your zoom level and background color
- Enter your preferred filename
- Step 3 : Click Capture Hit the 📸 Capture button. A progress bar will animate while the tool loads and renders your webpage. Most captures complete in 3–8 seconds depending on page complexity.
- Step 4 : Preview Your Screenshot The live preview panel shows your captured image. Review it to make sure the page loaded correctly and the layout looks as expected.
- Step 5 : Download or Copy Click ⬇ Download Image to save the file to your device, or 📋 Copy Image to copy it directly to your clipboard. Want a fresh capture? Hit ↺ New Capture to start over.
Who Is This Tool For?
This Webpage to JPG converter is useful for a surprisingly wide range of people:
- Web Designers & Developers use it to capture before/after comparisons of design changes, document bugs with visual evidence, or show clients how a website looks on different devices all without leaving the browser.
- Digital Marketers use it to screenshot competitor landing pages, save examples of ad creatives for reference, or capture content for reporting and client presentations.
- Content Creators & Bloggers use it to illustrate tutorials with real website screenshots, capture news articles for reference, or create social media content from web-based sources.
- Project Managers & Consultants use it to document website states for audits, create visual reports, or archive the appearance of a page at a specific point in time.
- UX Researchers use it to capture multiple viewport sizes of the same page for side-by-side comparison during usability studies or accessibility reviews.
- Students & Educators use it to save web-based resources as images for presentations, study notes, or printed handouts.
Privacy & Security: What Happens to Your Screenshot?
This tool uses a secure, external screenshot API to render and capture webpages. No login is required, no images are stored on our servers after delivery, and no personal data is collected during the process.
The tool processes your request, delivers the image to your browser, and that’s it. You’re in full control of where the image goes from there save it locally, share it, or copy it to your clipboard.
Only public URLs can be captured. Pages behind login walls, paywalls, or private authentication cannot be accessed by the capture service, which also means the tool cannot access any of your private data.
FAQs about Convert Webp to JPG Online
Can I capture any website using convert webp to JPG tool?
The tool works with any publicly accessible URL. Private pages, login-protected content, or intranet URLs cannot be captured.
Is there a watermark on downloaded images?
No. All images are downloaded completely free of watermarks.
Do I need to create an account?
No account, no email, no signup required. Open the tool and start capturing immediately.
What’s the best quality setting to use?
For most uses, 85–90% quality produces excellent results with manageable file sizes. Use 100% only when pixel-perfect accuracy is essential, as it significantly increases file size.
Why use delay settings?
Pages with JavaScript animations, lazy-loaded images, or auto-playing video thumbnails need a second or two to fully render. A 2–5 second delay ensures the capture tool grabs the page at its fully loaded state.
Can I capture a mobile version of a website?
Yes. Select “Mobile (390px)” in the Screen Width setting and the tool will render and capture the mobile-responsive version of the page.